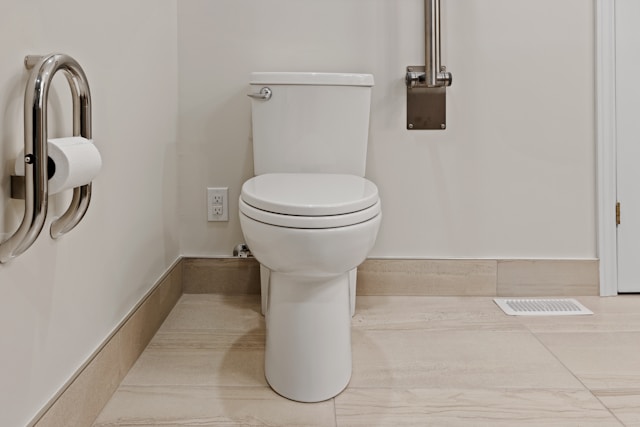
Comprehensive Guide on How to Repair or Install a Toilet in Memphis, TN
If your toilet is leaking, running endlessly, or you’re simply ready for an upgrade, this comprehensive guide will walk you through the essentials of repairing or installing a toilet. With the right tools and a little patience, you can tackle this DIY project confidently—saving money and gaining plumbing bragging rights in the process.
🧰 What You’ll Need
Whether repairing or installing, gather these tools before you begin:
- Adjustable wrench
- Screwdriver
- Plumber’s tape
- Bucket and sponge
- Replacement parts (flapper, fill valve, wax ring, etc.)
- New toilet (if replacing)
Optional but helpful:
- Gloves
- Putty knife
- Level
🔧 Repairing a Toilet
Most common toilet issues are quick fixes. Here are a few DIY solutions:
1. Fixing a Running Toilet
- Remove the tank lid and inspect the flapper. If it’s worn or doesn’t seal properly, replace it.
- Check the fill valve. If it doesn’t shut off, adjust the float height or replace the valve.
2. Addressing Weak Flush or Clogs
- First, make sure the tank is filling adequately.
- Use a plunger to clear blockages. If needed, a closet auger can tackle stubborn clogs.
- Clean mineral buildup in the rim holes under the toilet bowl for better flushing performance.
3. Stopping Leaks at the Base
- Shut off the water supply and empty the tank and bowl.
- Remove the toilet and replace the wax ring underneath. A fresh wax ring ensures a tight seal and prevents leaks.
🚽 Installing a New Toilet
Step 1: Remove the Old Toilet
- Turn off the water supply valve and flush to drain the tank.
- Disconnect the water line and unscrew the bolts at the base.
- Gently rock the toilet to break the wax seal and lift it out. Stuff a rag in the drain hole to block gases.
Step 2: Prep the Area
- Scrape away old wax with a putty knife.
- Check the condition of the toilet flange. Replace or repair if cracked.
- Position a new wax ring on the flange or underside of the new toilet.
Step 3: Install the New Toilet
- Lower the toilet onto the flange, aligning the bolts through the holes.
- Press down evenly to compress the wax ring and create a seal.
- Tighten the bolts—but not too much, as porcelain can crack.
Step 4: Reconnect and Test
- Reattach the water supply and turn the valve on.
- Let the tank fill, then flush a few times to check for leaks and proper operation.
- Caulk around the base for a finished look (optional but recommended).
✅ Final Tips and Reminders
- Always turn off the water before beginning any toilet repair or installation.
- Double-check for leaks after reconnecting.
- Choose a toilet with a water-saving flush to improve efficiency and lower bills.
By following this guide, you’ll save time, money, and potentially avoid an expensive call to the plumber. Whether repairing a simple part or installing a brand-new throne, it’s all about preparation and precision.
Want help choosing the perfect toilet for your bathroom style or layout? I’d be happy to help with that, too. 🚽✨ Contact Handyman Services 1-901-612-2502
🚫 Common Toilet Repair Mistakes to Avoid
1. Over Tightening Bolts and Connections
- Cranking bolts too tight can crack the porcelain or deform rubber gaskets.
- Use just enough torque to create a seal—typically ¼ to ½ turn past hand-tight is plenty.
2. Skipping the Water Shutoff
- Always turn off the water supply before starting any repair.
- Forgetting this step can lead to flooding or a surprise geyser when disconnecting parts.
3. Using the Wrong Tools
- Avoid makeshift tools that can damage fittings or strip threads.
- Essentials include an adjustable wrench, pliers, putty knife, and plumber’s tape.
4. Mismatching Replacement Parts
- Not all flappers, fill valves, or flush valves are universal.
- Measure or bring the old part to the store to ensure compatibility.
5. Improper Wax Ring Installation
- Misaligning the toilet or reusing an old wax ring can cause leaks at the base.
- Always use a new wax ring and press the toilet down evenly to form a proper seal.
6. Ignoring Small Leaks
- A tiny drip can lead to mold, warped flooring, or costly water damage.
- Address leaks promptly and inspect for hidden moisture around the base.
7. Forgetting to Level the Toilet
- An uneven toilet can rock, break the wax seal, or stress the flange.
- Use a level before tightening bolts and shim if needed.
8. Using Harsh Chemicals
- Drain cleaners can damage pipes and seals.
- Stick to plungers or toilet augers for clogs, and use vinegar-based solutions for cleaning.
9. Not Testing After Repairs
- Always flush several times and check for leaks before calling it done.
- Watch the tank fill, listen for running water, and inspect around the base.
Avoiding these pitfalls can save you time, money, and a whole lot of cleanup. If you’re ever unsure whether a fix is DIY-friendly or pro-worthy, I can help you weigh the risks. Want a quick checklist to keep on hand for your next repair?


 Previous Post